

The cleanest way to hide an LED neon sign cable is to plan the sign, outlet, cable exit and power-supply location as one installation. For an existing wall, a straight surface raceway painted to match the wall is usually the most practical permanent-looking option. Furniture, slat walls and millwork can also screen a route while keeping connections accessible. Concealed or hardwired work should be planned with the appropriate qualified electrical professional rather than improvised after the sign arrives.
Do not focus only on making the thin lead disappear. The power supply, controller or dimmer, plug and outlet also need a safe, reachable place. A beautiful sign with a loose adapter hanging halfway down the wall is not a finished installation.
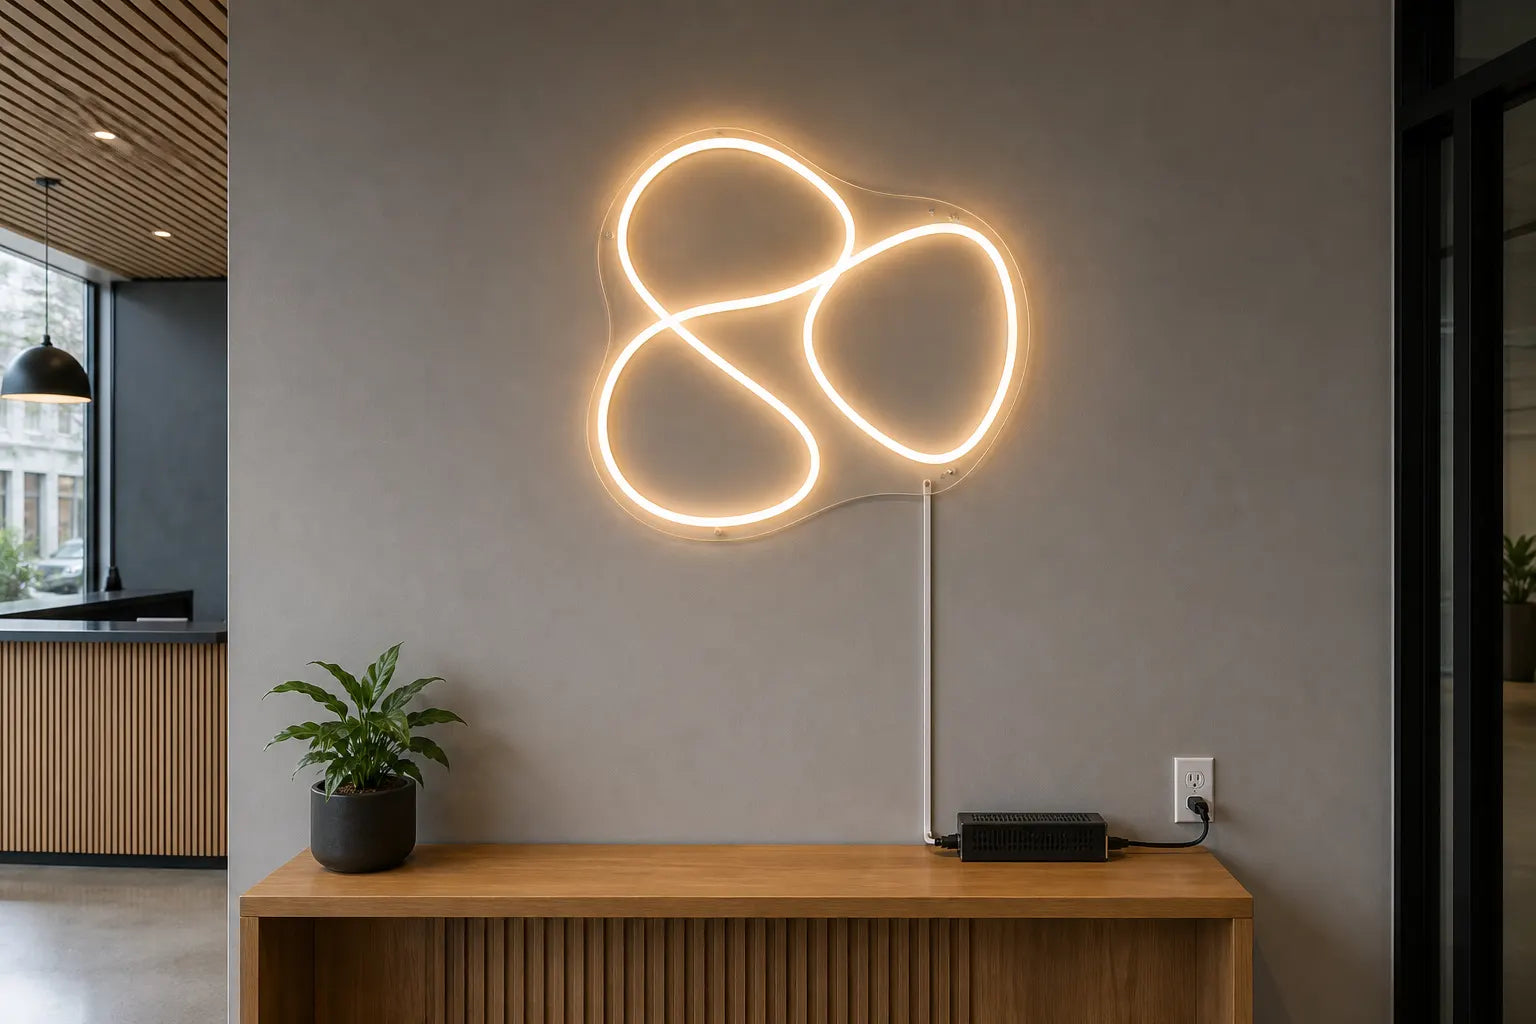
Concept rendering of a planned cable and power-supply route; it is not a customer installation, and the correct arrangement depends on the sign and site.
Start with the complete power path
Before mounting the sign, identify every part between the illuminated design and the wall outlet:
- The lead that exits the sign
- Any intended connector, dimmer or controller
- The compatible power supply
- The plug and receptacle
Lay the components out in order without altering them. Measure the usable route, note where each connection lands and keep enough slack to avoid tension. Do not assume a product photo shows the cable exit or component spacing for your exact build. Review those details during proof and installation planning; our custom neon proof checklist explains what to confirm before production.
The route should remain clear of doors, drawers, chairs, carts, heat, water, sharp edges and regular foot traffic. It should also let someone unplug and inspect the sign without dismantling a wall.
Choose the route before choosing the hiding method
The shortest path is not always the neatest. A diagonal cable can be shorter than a vertical route, but it is much more visible. In most rooms, a line that drops straight down, follows a wall edge or aligns with millwork looks deliberate.
Stand at the main viewing point and compare three possible routes:
- Straight down to an outlet below the sign
- Sideways to a wall edge, then down
- Into planned furniture or millwork beside the sign
Check the route from the room entrance and from any customer, guest or camera position. If the sign is part of a reception or photo wall, a cable hidden from straight on may still be obvious from a side angle.
Cable-hiding options compared
| Method | Best for | Main advantage | What to plan carefully |
|---|---|---|---|
| Paintable surface raceway | Finished homes and business interiors | Clean line without opening the wall | Size, adhesive or fasteners, corners and access to connections |
| Furniture or open shelving | Bedrooms, offices and low installations | Uses the room layout to screen components | Ventilation, pinch points and future furniture movement |
| Slat wall or removable decorative panel | Reception, retail and feature walls | Integrates the route into the design | Service access and attachment to the real wall structure |
| Millwork or cabinet chase | New counters and commercial renovations | Highly controlled, professional finish | Coordination before fabrication and adequate access |
| Outlet planned near the sign | Renovations and new construction | Minimizes visible cable | Qualified electrical design, location and future service |
| Temporary fabric or greenery route | Events and photo backdrops | Fast and reversible | Secure support, heat clearance and protected floor crossings |

Concept rendering of a visible, serviceable component route; it is not a customer installation, and the correct arrangement depends on the sign and site.
Option 1: use surface raceway on a finished wall
A surface raceway is a slim channel made to guide cable across a wall. When its size suits the components and it is installed in a straight line, it usually looks cleaner than a loose cord or a row of mismatched clips.
Choose a route with the fewest visible turns. Confirm that the channel can hold the intended low-voltage lead without crushing it and that the cover can close normally. Do not force a bulky connector into a channel that is too small. Leave intended connections outside the raceway unless the component instructions and the installation plan specifically allow otherwise.
The raceway can often be painted to match the wall, but verify the manufacturer's surface and paint instructions first. A dark route can disappear better on a charcoal wall; clear or white is not automatically less visible.
Option 2: screen the cable with furniture
A console, reception desk, shelf or cabinet can hide the lower part of the route and provide a stable place for the power supply. This works best when the furniture is part of the permanent layout rather than something likely to be moved.
Keep the power supply in an open, dry, accessible position with the airflow its instructions require. Do not wedge it behind a drawer, bury it under stored items or let furniture legs pinch the cable. Keep plugs and connectors reachable so staff can switch off, unplug and inspect the sign.
If the furniture sits away from the wall, view the setup from both sides. A cable that disappears from the front may become the first thing people see from the doorway.
Option 3: design the route into a slat wall or feature panel
Slat walls, removable decorative panels and selected acoustic features can make cable planning part of the display. The sign still needs proper support from the actual wall or an installation system designed for the load; decorative cladding should not be treated as structural merely because it covers the route.
Plan a removable access point for the power supply, controller and connectors. A fully closed feature wall can look clean on opening day and become difficult to service later. If the installation is in a public or commercial space, coordinate the wall build, mounting and electrical plan before the panel is closed.
The LED neon acrylic backing guide can help you compare panel shapes and mounting approaches before the cable route is finalized.
Option 4: coordinate concealed power during renovation
If the wall is open or new millwork is being fabricated, decide where the sign will sit before outlets and access panels are placed. Provide the installer with the complete sign dimensions, mounting-hole positions, proposed cable exit, component layout and main viewing angle.
Do not put a standard extension cord or a removable sign cord through a wall. Health Canada's current electrical product safety guidance warns against running extension cords through walls, doors or ceilings, under rugs, or permanently securing them. Permanent concealed or hardwired work is a different installation and should be handled under the applicable local requirements by the appropriate qualified person.
Our step-by-step neon sign installation guide covers the broader mounting sequence. If you want professional help with the sign itself, review our LED sign installation service.
Where should the power supply go?
The best location is dry, accessible, stable and close enough that no cable is pulled tight. It should not sit in a walkway, hang by its leads or be sealed inside an unventilated decorative box.
Good locations may include:
- An open shelf below or beside the sign
- A ventilated, serviceable cabinet area designed for the component
- A protected ledge behind a reception desk
- A removable access area in coordinated millwork
- An appropriate indoor location on the other side of a removable display panel
Do not cut, splice, extend or substitute electrical parts simply to make them fit a hiding place. If the supplied arrangement does not reach the planned location, contact our team with the sign details and site photos before changing anything.
Keep the installation serviceable
Cable management should not turn a simple inspection into demolition. At minimum, staff or the homeowner should be able to:
- Switch the sign off and unplug it
- Reach the power supply, controller and intended connectors
- Inspect the cable for crushing, cuts, looseness or heat damage
- Remove dust around components
- Confirm that furniture or décor has not shifted onto the route
Include these points in the regular checks described in our LED neon cleaning and maintenance guide.
Temporary event and backdrop installations
For a wedding, trade show or pop-up, the route may need to be installed and removed in one day. Keep it simple: follow the approved hanging points, guide the lead down the back or edge of the structure, secure it without pinching it, and protect any unavoidable floor crossing with a suitable cable-management method for the venue.
Do not tape a power supply to fabric, allow a loose adapter to swing behind a backdrop or hide plugs where staff cannot reach them. Confirm venue rules, outlet locations and teardown responsibilities before setup. The person removing the display should know where every cable, controller and power component is located.
Common cable-management mistakes
Choosing the sign position before finding power
The sign is centred beautifully, but the nearest outlet creates a diagonal cable across the wall. Photograph and measure the outlet during the first site check.
Hiding only the thin cable
The lead disappears while the power supply remains exposed or suspended. Place every component on the route diagram before approving the solution.
Sealing components behind a permanent panel
The wall looks clean but the sign cannot be unplugged or inspected. Build in service access.
Pinching cable behind furniture
A cabinet pushed against the wall can crush or sharply bend the cable. Create a protected route and re-check it after furniture moves.
Treating a temporary cord as permanent wiring
Do not run removable cords through a wall, ceiling, doorway or under a rug to simulate a concealed electrical installation.
Assuming clear cable will disappear
Clear insulation can reflect light and collect shadows. Match the route to the wall, not just the cable colour shown in a product image.
Cable-route checklist
Before installation, confirm:
- The sign's complete dimensions and mounting position
- The intended cable-exit location
- The outlet and component locations
- A straight route clear of traffic, heat, water and moving furniture
- Enough length without tension or improvised electrical changes
- A stable, accessible and appropriately ventilated power-supply position
- The correct raceway, clips or coordinated millwork plan
- Access for switching, unplugging, cleaning and inspection
- Qualified help for concealed, hardwired, high or otherwise site-specific work
Ready to plan a clean installation from the first proof? Send our team the wall photo, usable dimensions, outlet location, intended mounting method and main viewing angle through the custom neon sign quote form. We can design the sign and its cable exit around the real space instead of treating power as an afterthought.
